Thursday, 4 August 2011

Pastel De Tres Leches

It's a complete mystery to me why Tres Leches cake is not as popular everywhere as it is in Mexico. It's not particularly difficult and requires no unusual techniques or ingredients, and the resulting cake is light and moist and really gorgeous. It is basically a sponge cake soaked in a combination of three different kinds of milk; evaporated milk, condensed milk and either cream or, as here, whole milk.

I'm not going to go into a lot of detail, for one when it comes to baking I have little expertise to offer, I just follow the recipe the same as everybody else and secondly the recipe below is taken from an episode of Good Eats and you can get all the information you require from the episode here rather than second hand from me.

Clearly a recipe that contains a can of condensed milk and a can of evaporated milk is not a very traditional one and no doubt the recipe owes quite a bit to Nestle or whatever company first put the instructions on the side of a can, however the end result is quite elegant, and we are certainly not entering into the realm of cooking where every recipe calls for a can of Campbell's Mushroom Soup. While not traditional, it is popular. Mexican pastry cooking is very very impressive and any cake that can hold it's place here is worth your attention.

The common variations seem to be to add a fruit purée, usually mango, to the cake. Fanny Gerson's recipe from her book, which I mentioned in an earlier post, includes fruit between two layers of sponge. Personally I don't like this, I prefer the cake to come as a single square of sponge, topped with cream. The only amendment I made to Alton's recipe was to to the cake with plain whipped cream rather than sweetened cream as I find the cake a little less cloying that way. There is a restaurant close to may apartment which serves the soaked sponge, which is coated in toasted nuts, on a small cast iron pan, sitting in a pool of the three milk mixture. It is very very classy and delicious.


Good Eats Tres Leches Cake

Ingredients

For the cake:

  • Vegetable oil
  • 6 3/4 ounces cake flour, plus extra for pan
  • 1 teaspoon baking powder
  • 1/2 teaspoon kosher salt
  • 4 ounces unsalted butter, room temperature
  • 8 ounces sugar
  • 5 whole eggs
  • 1 1/2 teaspoons vanilla extract
For the glaze:
For the topping:
  • 2 cups heavy cream
  • 8 ounces sugar
  • 1 teaspoon vanilla extract

Directions
For the cake:
Preheat the oven to 350 degrees F. Lightly oil and flour a 13 by 9-inch metal pan and set aside.
Whisk together the cake flour, baking powder and salt in a medium mixing bowl and set aside.
Place the butter into the bowl of a stand mixer. Using the paddle attachment, beat on medium speed until fluffy, approximately 1 minute. Decrease the speed to low and with the mixer still running, gradually add the sugar over 1 minute. Stop to scrape down the sides of the bowl, if necessary. Add the eggs, 1 at a time, and mix to thoroughly combine. Add the vanilla extract and mix to combine. Add the flour mixture to the batter in 3 batches and mix just until combined. Transfer the batter to the prepared pan and spread evenly. This will appear to be a very small amount of batter. Bake on the middle rack of the oven for 20 to 25 minutes or until the cake is lightly golden and reaches an internal temperature of 200 degrees F.
Remove the cake pan to a cooling rack and allow to cool for 30 minutes. Poke the top of the cake all over with a skewer or fork. Allow the cake to cool completely and then prepare the glaze.

For the glaze:
Whisk together the evaporated milk, sweetened condensed milk and the half-and-half in a 1-quart measuring cup. Once combined, pour the glaze over the cake. Refrigerate the cake overnight.

Topping:
Place the heavy cream, sugar and vanilla into the bowl of a stand mixer. Using the whisk attachment, whisk together on low until stiff peaks are formed. Change to medium speed and whisk until thick. Spread the topping over the cake and allow to chill in the refrigerator until ready to serve.

http://www.foodnetwork.com/recipes/alton-brown/tres-leche-cake-recipe/index.html

Tuesday, 21 June 2011

Another cookbook.


I like this one an awful lot. It's approach is very different from the other books which aim to be encyclopaedias of Mexican cooking. This book has a much narrower range (and somehow seems to accomplish more as a result), he covers a large variety of salsas, followed by a number of different guacamoles, then nut thickened sauces and moles. Finally all of the various sauces are drawn on in the final chapters in a variety of meat and fish dishes.

There isn't a huge emphasis on the ethnographic matters that Diana Kennedy and Rick Bayless cover, for example there isn't a huge chapter in this book, as there is in the other two, on dishes made from corn masa. Rather he is satisfied with a brief description on the method of making corn tortillas, the salsas and moles making up the heart of the book.

There are a couple of very interesting recipes. There is a restaurant here in Monterrey which specialises in chicken tostadas smothered in crema and a very smooth guacamole containing tomatillo - there is a recipe here for this guacamole, which is something I have been meaning to try for a while now. I also have a bag of pumpkin seeds waiting in the cupboard to be included in a pumpkin seed sauce, something he has a straightforward example of.

The book is beautifully photographed by Romulo Yanes, who was a photographer for Gourmet magazine for nearly 25 years, everything looks delicious without looking manicured or overly fussed with.

Santibanez himself seems to have come from a European culinary background and is careful to spend time explaining how the techniques used are different from those which would be familiar to someone more acquainted with French or Italian cooking.

Monday, 13 June 2011

Carne en Salsa Colorada

Another approach to creating a salsa aside from those based on tomato, tomatillo or vinegar, all of which we have seen already, is to use toasted dried chiles blended with water or stock as the base and thicken the resulting mixture with a roux made of lard and masa harina. This type of salsa is generally used to braise meat as opposed to being used as a condiment.

There are a lot of variations here. Different types of dried chiles can be used, the roux can be made from masa and lard, from flour and butter, a slurry of flour can be used or the roux omitted altogether and the salsa allowed to thicken naturally.

Toasting the Chiles and the Garlic
I used a combination of chile ancho, chile passila and small chile de arbol. The ancho has a deep raisin taste, the chile de arbol resembles a dried thai birds eye chile, they round out the flavour of the passila, giving additional depth and heat.

The easiest way to toast them is on top of a hot comal. You can remove the stem, split them down the middle, open them out, remove the seeds and membrane and then toast them briefly, pushing them down with a spatula for a few moments on each side until they are fragrant but not burnt. Alternately you can lay the unopened on the comal, turning regularly and remove the stem, seeds and membranes afterwards.

I used roughly 3 anchos, a half dozen passila and another half dozen chile de arbol. After toasting the chiles are placed in a bowl of hot water to soak, weighted under a plate to keep them submerged if necessary.

As the chiles are toasting you also need to toast 3 or 4 cloves of garlic on the comal in their skins until soft.

Blending the Salsa
There a couple of divergences here. Some authors suggest that the soaking liquid is too astringent to be added to the blender. Some also suggest adding water while others use chicken stock.

Personally I don't find the soaking liquid to be a problem, however I would not add all of it to the blender lest the salsa be too loose, and I would certainly use chicken broth if some was available. Perhaps I'll just sit on the fence and suggest 3/4 of a cup of each.

Along with the liquid and the soaked chiles you will also need to add about 1/2 teaspoon each of oregano, cumin and salt. Blend everything to a fine purée.

Cooking the pork.
For the carne part of the dish I used leg of pork cut into 1cm dice. Pork shoulder would also be fine, in fact any meat which benefits from long slow moist cooking would work well.

The neat needs to be browned on all sides, when the meat is coloured remove from the pan. In a clean pot make a roux from a tablespoon of lard and a tablespoon of masa, allow to cook through and then add the salsa, straining it through a sieve to catch any pieces of chile or cumin that didn't blend fully, then add the meat and any juices to the salsa.

The whole thing is simmered slowly until the meat is tender - at least and hour.

The meat and salsa freezes well. It makes a beautiful taco, either with the meat left in cubes or pressed lightly with a masher while reheating so that is falls into strips and drinks up the salsa.

Saturday, 11 June 2011


A selection of salsas:
Habenero salsa from previous recipe, Cholula Chipotle Salsa (mild and smokey), El Yucateco Habanero Salsa (very hot), Valentina salsa Picante (mild and citrusy), La Anita Habanero Salsa (insanely hot).

Habanero Salsa

My tolerance for chile, and habanero in particular has increased a lot over the past 18 months. This is a good thing. Habaneros, though hot, have a unique fruity taste, quite different from the crisp clear heat of a serrano, it is a much more interesting taste - provided you can stand the heat!

This salsa is fairly hot. It takes a different approach from the tomato or tomatillo based salsas we have seen already in that it is a vinegar based salsa. There are very few ingredients; chiles, water, vinegar, onion, garlic and salt.

I was a little careless in measuring the quantities, in truth it was just an initial exploration and I was surprised it turned out so well. The quantities here should be taken as a guide rather than a blueprint.

To temper the heat slightly I used some serrano along with the habanero, so the final list of ingredients was:

1/2 to 3/4 cup of water
An equal quantity of red wine vinegar
2 chocolate habaneros (though orange or green would be fine)
2 cloves of roasted garlic
2 roughly chopped serranos
A couple of slices of onion
A good helping of salt.

Everything was added to a small saucepan and simmered for 10 minutes or so. You need a roughly equal quantity of water and vinegar. Cider vinegar would be more authentic but red wine vinegar was what I had available, and considering the quantity of chile I'm not sure it would be possible to tell the difference anyway.

The poached ingredients were blended until smooth and the seasoning adjusted. You should end up with about a cup of a loose salsa with the consistency of pouring cream.

I find the sauce to be hot without being totally overpowering, it keeps the nice fruity floral taste of habanero. It's certainly ho enough to get your attention but it doesn't obliterate whatever it's eaten with and it is certainly much less spicy than some of the bottled habanero salsas you can by in the shops here.

Sunday, 29 May 2011

Sweet Tamales With Rasins and Pecans

I have tried these sweet tamales a couple of times, once with shortening as a fat but I have also made them also using butter. The recipe below (apart from the vanilla) is from Fanny Gerson's book but there is a similar recipe in Rick Bayliss which has raisins but does not include the pecans.. These are a nice treat, they make a excellent breakfast and, as they freeze well, they are convenient.

I have been trying, without success, to find some logic in the ratios of masa to fat that people use, and to whether or not baking powder is used. Generally the ratio of masa to fat, whether butter, shortening or lard, is about 4:1 but some recipes have more fat than this and some have less but as a general rule of thumb a ratio of 4:1 works well, whether for sweet or savoury tamales. The recipe below has baking powder included,  One would imagine that baking powder is used mostly in sweet tamlaes and that savoury tamales contain no baking powder. That doesn't seem to be the case. There are many recipes for savoury tamales that contain baking powder and I have made sweet lime zest tamales, again from Fanny Gerson's book, which contain no baking powder.
 
There is a small amount of organisation involved in tamale making, perhaps less for sweet tamales that for savoury filled ones, as there is no salsa and meat to be prepared beforehand. For sweet tamales all that is really required is enough time to soften the corn husks and to ensure that the fat is at room temperature and workable.

I'm not going to spend a lot of time going through the mechanics of things. You are going to make a dough, get it into a corn husk and steam it for an hour to a hour and a half. Many of the descriptions of the process seem determined to make it more mysterious than this and somehow dependant on lots of arcane knowledge. In truth, it isn't difficult and it's a hard thing to fuck up too badly.

Making the Dough

I don't have a stand mixer, so I use a hand mixer to mix the batter, before that I mixed everything by hand without any problem, aside from some cramp and a denser batter.

Firstly the fat is beaten to lighten it, after that the sugar is creamed with the fat for about half a minute. When the fat and sugar have been creamed together the masa harina and liquid are beaten in alternately. Gerson's procedure is different - the water is first boiled and the masa harina is beaten into the boiling water and then the masa is gradually beaten into the creamed sugar and fat, alternating with some milk to keep the mixture pliable. She, in fact, describes the dough as "pourable". This is not a method I have seen elsewhere and I have gone with the more common method of gradually incorporating the masa harina and the liquid into the creamed fat and sugar.

The batter should be light. The classic test is to see whether some of the dough will float in water.

When the batter is light enough add the salt, vanilla and the baking powder, mix briefly to incorporate and then stir in the raisins and the pecans.

Filling the Cornhusks

A quick soak of 30 minutes or so in very hot water is plenty to make the cornhusks pliable. There are two sides to the cornhusk, there is a smoother and a more textured side. I have seen both sides recommended as the correct side of the cornhusk to fill. It seems easier to me to think in terms of the concave and convex side of the cornhusk and it seems stupid to try and fight nature and fill the cornhusk on the convex side.

For these sweet tamales you are looking for about a quarter cup of dough in each cornhusk. Put an oblong of the dough on the mid line of the cornhusk close to the top of the cornhusk. The dough will expand as it is steamed so be careful not to fill to the very top, leave a little room for expansion.

Roll the cornhusk and fold the bottom of the cornhusk up toward the middle. There is no need to tie the tamale, as you are preparing them keep them folded side down so they won't unwrap. Once the tamales are all standing together in the steamer they can't come undone.

Steaming

If you have a tall pot that is best. I don't, and just use the biggest I have with a steamer basket in the bottom. Mine isn't tall enough for the tamales to be kept completely vertical, but once they are stacked carefully and are not resting in the water there won't be any trouble.

They need to be steamed for an hour or more. The test for doneness is that the tamale should come away from the cornhusk easily.

These keep well in the freezer, kept in the cornhusks in a freezer bag and can be reheated in the microwave again still in the cornhusk.

Sweet Tamales With Rasins and Pecans
1 to 1 1/2 cups warm water
1 1/2 cup Massa Harina
1/2 cup butter
1 Cup brown sugar
Salt
1 1/2 tsp baking powder
1 tsp cinnamon
1/2 cup pecans
1/2 cup raisins
Vanilla essence

Sunday, 20 March 2011

Sopa De Tortilla

Sopa de Tortilla

I've playing around with this recipe for a while. For a number of reasons, firstly there is a pretty wide variety of approaches, some recipes use pork, others chicken, some are very simple and others have a large list of ingredients. Secondly the basis of the soup, the light broth enriched with a purée of tomato, onion and chile is common to lots of Mexican soups and a lot of Mexian recipes in general, and is something which I have been having difficulty with.

Seeing as so many sources which I regard as authoritative have different approaches to the dish, I picked the elements I have like best from what I have read, seen online and actually eaten in restaurants here. The dish I prefer is a soup of fried tortilla strips, served in a light broth enriched with tomato and garnished with cubed avocado, panela cheese, corriander and strips of passila chile.

The tomato base
We have seen this a number of time already, and the preparation is a fundamental to Mexican cooking as sofrito and mirepoix to Spanish and French cooking.

I have tried using raw tomatoes, onion and chile blended with water, which works fairly well and which I have seen used by lots of Mexican cooks online. The problem I find with this is that when the mixture is cooked out it tends to from a scum and it has a tendency to separate. I have also tried halving the tomatoes and cooking them on a dry non stick pan before blending them. This works a little better but still won't produce the light clear broth I am looking for.

The best approach would seem to be char the tomatoes under a hot grill (or broiler for any Americans), however while a have a lovely, and enormous, gas oven and a six burner hob in the apartment, I don't have a grill, so that approach is out.

The best compromise I have found, for soup at least, is to boil the tomatoes for five or ten minutes, skinning and coring them and then blending the flesh. When this is blended with the onion and chile the resulting mixture is homogeneous and cooks out to a beautiful golden colour and isn't inclined to foam.


Sopa De Tortilla
To make a single serving, I boiled a single large roma tomato, skinned and cored it and added it to the blender with a slice from a medium onion, a clove of garlic, about 3/4 of a serrano chile, salt and enough water just to allow the blades turn.

I cooked the mixture out in a small quantity of lard. This takes about 10 minutes and you need to be careful not to allow the mixture catch. While this was cooking I sliced two tortillas into strips 1/2" wide and fried them until golden in a small pan in an inch or so of corn oil. When they were golden brown I drained them on some paper and fried a garnish of passila chile strips in the oil.

I added chicken broth to the cooked tomato and brought the mixture to a gentle simmer. 

I put the fried tortilla strips in the bottom of the bowl, topped them with a half of an avocado cut into cubes and the same quantity of queso panela. Then I poured the broth gently over all of this and garnished with the passila, some coriander and a drizzle of crema and served with a couple of wedges of lime.

It was damn nice.

The broth is refreshing, delicate yet spicy. It seemed odd at first to eat avocado in something hot but they add a lovely creaminess, and there is a hint of acidity from the crema.

Saturday, 19 March 2011

Yet more cookbookery.


I picked this up last week. The version I have is in Spanish and is about the size of a family bible. How the hell I'm going to ship this growing library of Mexican cookbooks back home when the time comes is becoming a concern!

Unlike the other book of Diana Kennedy's I have this one is illustrated. This book is also far more rustic.... even with my terrible Spanish I'm pretty sure that the HEB around the corner doesn't stock Iguana meat.

Flores de Calabaza

The last time I tried to tackle squash flowers, when I took them from the fridge a couple of days after buying them they had already turned to mush. So be warned, work quickly. They are best used the day of purchase.

The squash flowers here are not actually the same as the flower you see attached to baby courgettes, the squash flowers here are the flowers of a larger tougher vegetable.

There are a couple of recipes using the flowers in soups. The recipe I tried is pretty much directly from Rick Bayless with little modification. It is Flores de Calabaza Guisadas or Stewed Squash Blossoms. The flowers are lightly stewed in tomato with a saute of onion and chile. This is used as the filling for a quesadilla.

Cleaning the flowers is easy, though they are delicate, and personally I find the hairs on the stem and leaves unpleasant to handle. The stamen needs to be pulled out of the inside of the flower and the sepals pulled from the outside. The flowers are then carefully rinsed and cut crosswise into 1/2" pieces.


Flores de Calabaza Guisadas
I sautéed a half of a medium onion, diced, in lard with chile. I used two finely diced serranos, but it's a matter of taste. When the onion had softened I added the flesh of a roma tomato which I had boiled, skinned, cored and puréed in a little water and about 20 chopped squash flowers.

I seasoned this and let the whole lot heat gently for another few minutes and finally added some small cubes of queso panela and a small amout of corriander and let the mixture cool on a plate before using in the quesadilla.

Rather than making a proper empanada style quesadilla of masa, stuffing and deep frying it, I took the quicker option of heating some corn tortillas and placing the filling inside a doubled over tortilla and heating this on a dry comal. This shortcut is regarded rather sniffily by Diana Kennedy, however it's also how I see the guys where I work prepare their lunches every day, so good or bad it seems to be a common approach, and the idea of deep frying a Saturday lunch was not an appealing one.

The blossoms made a pleasant lunch, but I think I'd like to try the couple of soup recipes before deciding on whether squash blossoms are an unusual novelty or something I'd buy regularly. Perhaps they were a little drowned out by the onion and chile, but to my palate - dulled by cigarettes and whiskey :-( - there wasn't anything very distinctive about them.

Tuesday, 22 February 2011

Another cook book!


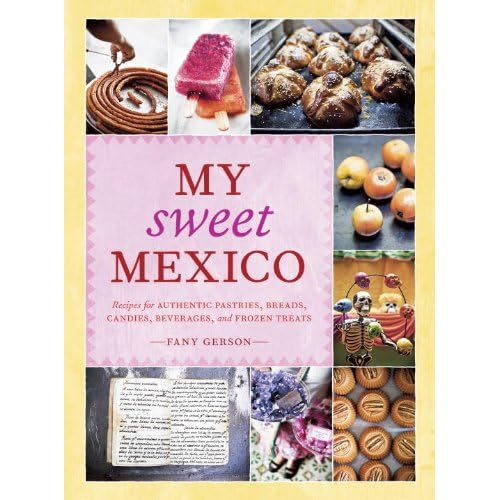
My Sweet Mexico: Recipes for Authentic Pastries, Breads, Candies, Beverages, and Frozen Treats.
by Fany Gerson

The book has only arrived today, but it is very very pretty and seems well researched. It covers all of the greatest hits of Mexican candies and cakes, and there are a couple of things which caught my eye that I had never seen before; a lime boiled and with the flesh scooped out then stuffed with coconut, and fantastic bright green lime zest tamales.  

The quality of Mexican patisserie is a constant surprise. As well as the very common flans there are lots of sweat breads with very enriched doughs and some gorgeous looking cakes.

Chiles Rellenos

I'm going to cover two types here, firstly a poblano chile stuffed with queso fresco and secondly a jalapeño stuffed with queso oaxaca, a type of melting cheese.

Poblanos Rellenos
These are a treat, the chile is soft and grassy with just a hint of heat and there is sharpness from the cheese, that cuts the oil. I think its best to use a queso fresco with a poblano as, given the larger size of a chile, any other cheese would be too rich.

There is nothing difficult here. The preparation is more a matter of motivation and organisation and there is certainly no difficulty, just be prepared for a lot of cleaning up! The only unusual item is the batter itself which is an egg white whipped to a stiff peak, with the yolk folded into it and stabilised with a spoonful of flour. The batter is therefore very light, it's not crispy like a tempura, neither is it dense like batters normally made with egg.

The first job is to roast the poblano. As you would do if preparing rajas.

The dough is prepared by beating the white of an egg to a stiff peak. (I don't have a mixer and have to do this with a small manual whisk, it's not actually as much of a chore as I thought it would be, although I probably stopped somewhere short of stiff peaks). When the egg whites have been beaten the yolk of the egg is folded in and I also add a tablespoon of flour just to stabilise the batter, but this is omitted in many recipes.

When the roasted peppers have been steamed and skinned, cut a slit in the side and extract the seeds and membranes and stuff the cavity with grated or crumbled queso fresco. Try and keep the slit as small as you can manage, you can use a couple of toothpicks to suture it back together after you have stuffed it, however if you work carefully there is no need as the batter will set before anything falls out.

Dust the stuffed chile with flour and then coat with the batter. Either deep fry or fry in an inch or so of corn oil.

Drain on some kitchen paper as the cooked chiles can be quite oily.

Jalapeño Rellenos
The procedure for jalapeño peppers is identical to that above, except the peppers are smaller and everything is more fiddly and infuriating!

Rather than using queso fresco though you can use a melting cheese like queso oaxaca, as the jalapeño is so much smaller and hotter than a poblano there would not be too much cheese and there is some heat to contrast the richness.

Tuesday, 23 November 2010

Tortillas De Harina

I had been putting off dealing with flour tortillas for a while. I had mistakenly though it would be fiddly work also the tortillas available in the shops here are great so I never took the time. They are small and dense, savoury with a speckling of small golden brown islands. They are nothing at all like the bready hubcaps that  I was used to from home.

They are very easy, and making them is the kind of kitchen work that involves a mix of routine and technique that is very satisfying. They require resting for a half an hour between kneading and rolling, however this is not as much of a nuisance as it sounds, it is short enough that preparing a batch of flour tortiallas on a whim is not a problem, and it is just long enough to go about preparing something to put in them when  they are done!

The conventional wisdom is that flour tortillas are most popular in the north of the country, I haven't seen enough of the country to contradict this, the only thing I have noticed is that flour tortillas seem to be more popular for breakfast tacos filled with things like chicharron or carne desherbrada, with corn tortillas being served at larger meals.

The Dough
I have tried using lard, vegetable shortening and butter. Rick Bayless recommends using a mixture of lard and vegetable shortening. Personally I find using lard alone gives the best taste and is what I use. Vegetable shortening is easy to work with but doesn't give the savoury taste lard does. Butter gives a slightly softer texture and (obviously) a nice buttery taste. I think in balance it is the better substitute if you don't have lard to hand.


The basic proportions are 5 to 1 of flour to fat. I work in 100g batches of flour, which would give 8 tortillas of about 7 inches diameter.  So for 100g of flour 20g of lard, a pinch of salt and enough warm water to bring the dough together. You won't need much water at all, just less than a quarter cup in this case, as you are aiming for a relatively tight dough, certainly nothing like the stringy mess you would have before you begin kneading a bread dough. Some recipes include some baking powder. There really is no point, the tortillas will puff up beautifully without it.

The quickest method is to cut the fat into the flour using a food processor, you can rub it in too, but the processor is much quicker. After combing the flour and lard, either in the processor or by hand, turn the mixture out into a bowl, add the water (with the salt dissolved in it) and bring together into a dough. Add just enough water to barely bring the dough together and knead the dough for a few minutes. Like I said earlier, it's not a bread dough so there is no need to break you heart kneading it, there is probably not enough water in the dough to create a lot of gluten anyway. A few minutes of kneading until you have a cohesive, homogeneous dough is plenty.

Roll the dough into a log, divide the log into eight pieces. Form each piece into a ball, roll the ball between your palm and the counter top to even it out, then flatten the ball slightly into a disk. Cover your eight little disks and leave to rest for about a half an hour.

Rolling the Tortillas
There is a knack to rolling, but it's still nothing to be intimidated by. Keep a small dish of flour in front of you as you work, keep the surface lightly floured. Take your first disk of dough and dip both sides of it into the flour, then you can begin to roll it.

The secret is to work from the centre of the disk, firstly away from you, then towards you. Work lightly, just a couple of inches at a go and rotate the disk about 1/8 of a turn each time. That's all there is to it - away a small bit, towards you a small bit and rotate a bit. Keep the board lightly dusted and flipping the disk over now and again as you work helps too. Don't go nuts, just work lightly but without hesitation. If you try to push the dough too much in a pass, you will find it impossible to make a round tortilla. You are aiming in the first full rotation to increase the size of the disk to about 3 or 4 inches then repeating the process to arrive at the final size.


Cooking the Tortillas
The tortillas cook fantastically quickly over a medium high heat, less than a minute each side depending on how hot the pan is, and often closer to 30 seconds. I use a cast iron comal, however any heavy pan would do fine. You will hear a sizzle as the tortilla is dropped on the pan and in a few moment blisters begin to form on the underside. It is very satisfying to see the tortilla begin to puff up, however I find it better to better to turn the tortilla before the smaller air bubbles begin to grow into each other and the tortilla balloons. This gives the speckling of golden brown spots that is most attractive. If you allow the tortilla to inflate completely then there will be just a single spot in direct contact with the heat. Like as with a corn tortilla you turn it twice.

You must also be careful not to allow the tortillas to overcook. You are looking for the spaces between the golden spots to retain a certain translucence and to look ever so slightly pasty.

Stash them in a tortilla warmer or wrapped in a tea towel to keep them warm. They keep pretty well in the fridge in plastic, although a small batch can be knocked together so easily there is little reason to have leftovers. I'm sure they can probably be frozen too, not that I ever had the opportunity to find out!